The LiteTracker program facilitates rewriting stories effectively and rapidly. The tool used for mass typography styles, when there are a lot of stories you need the same updates, is bulk editing that helps you save time and avoid chances of making mistakes. Doing this involvesgoing through the steps as is to assure yourself of the necessary skills, to be able to independently select and make all the changes including an update, a move, a clone, an export, and a removal of stories in bulk while keeping both ownership and review workflows intact.
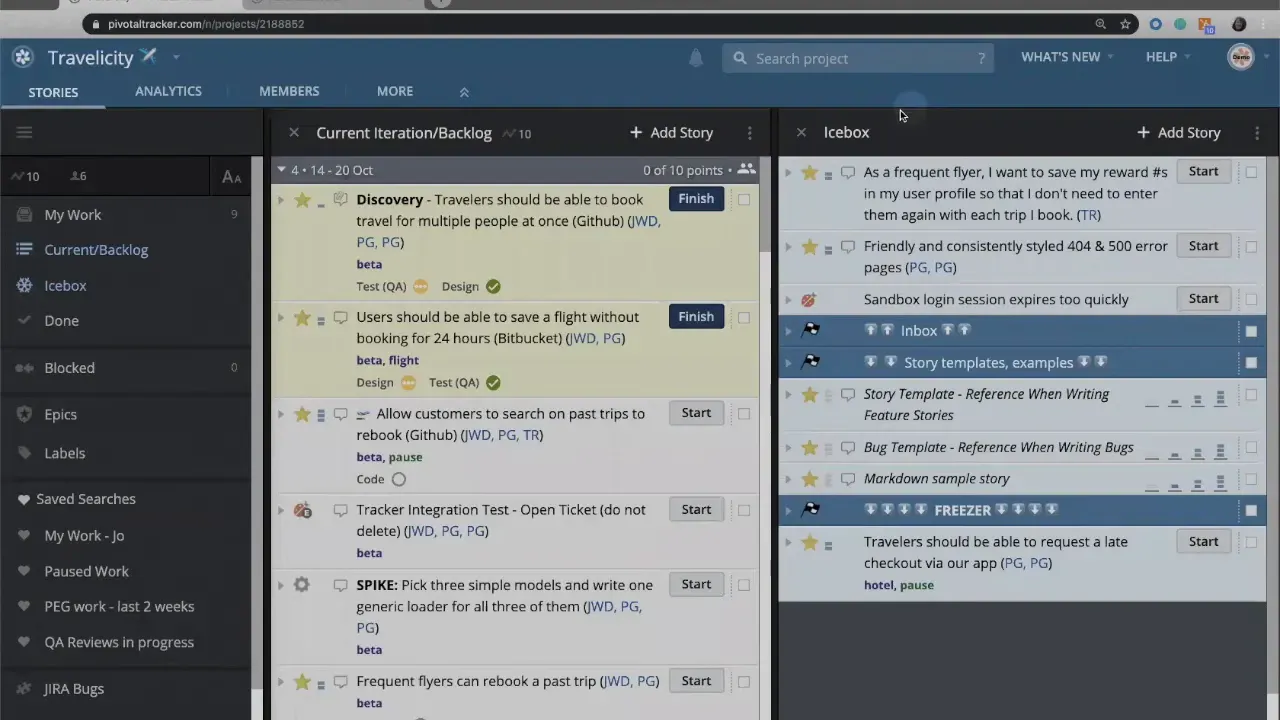
Step 1: Select the stories you want to change
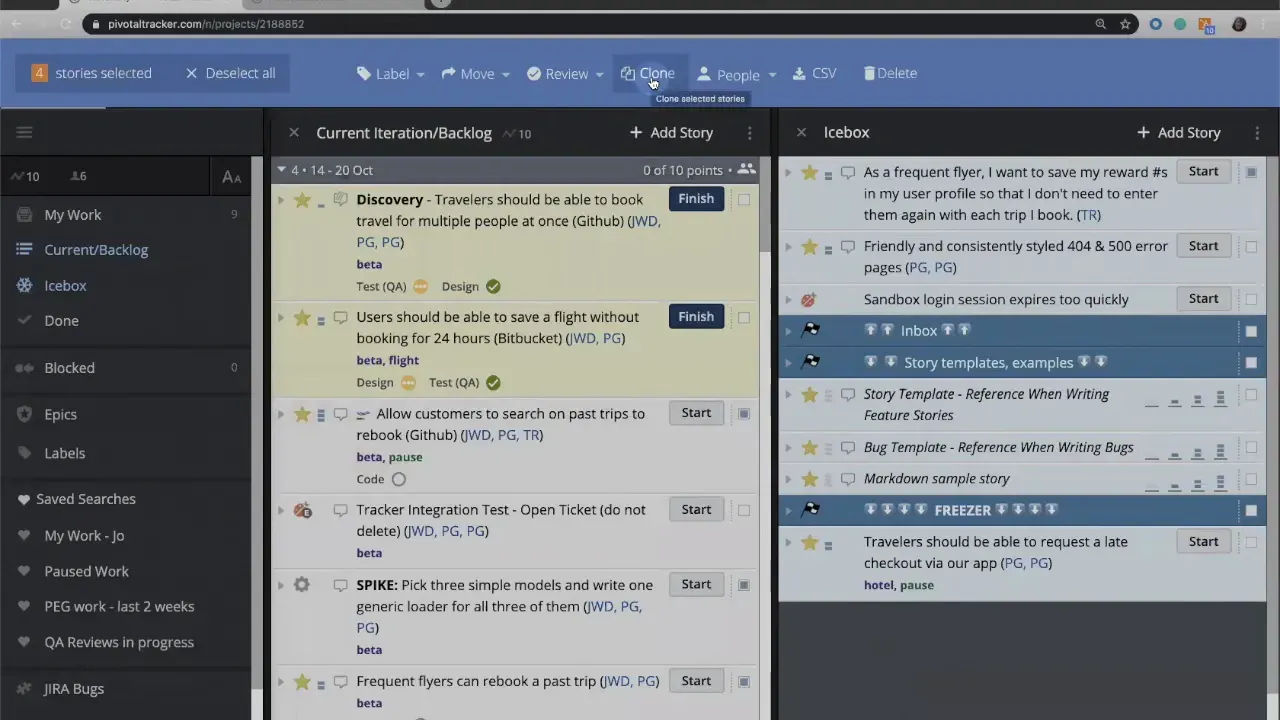
In the first step, you have to identify the stories that require identical updates. Every story is provided with a tiny checkbox on the right side. The picking of these checkboxes will help you to make a group of stories. This is the very first and most essential step as it allows you to apply the action only to the particular stories you've selected.
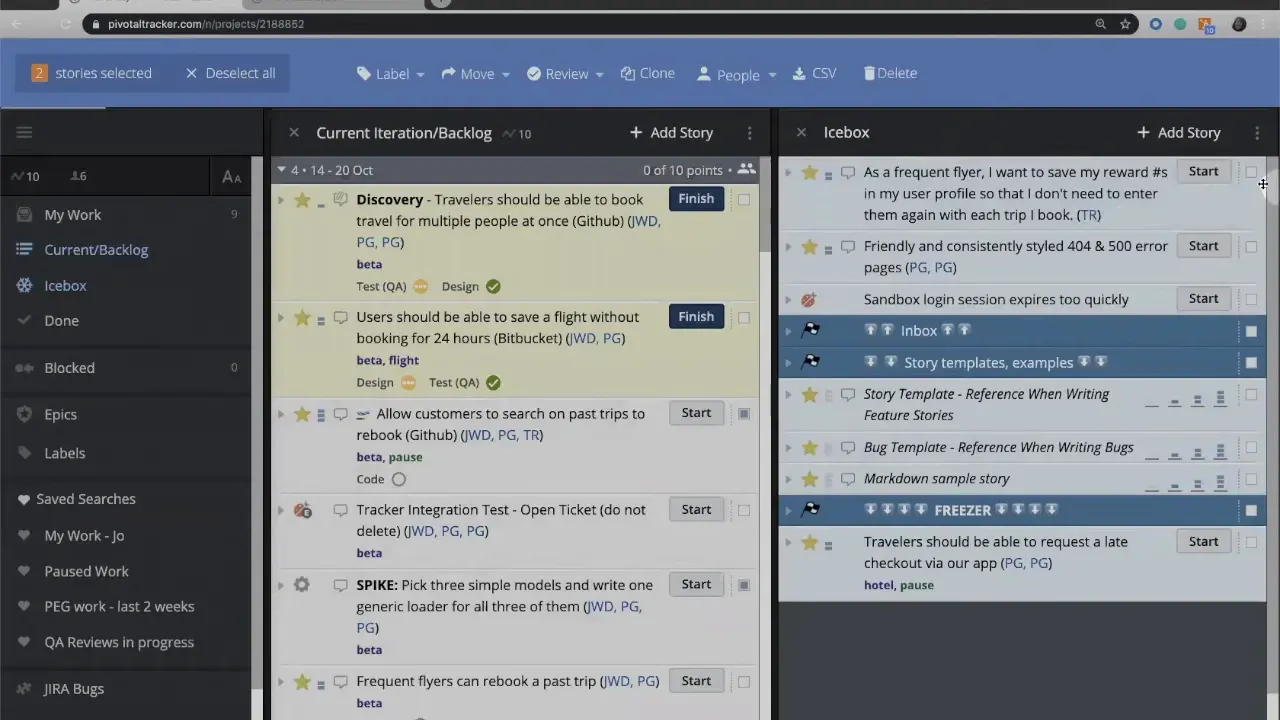
Step 2: Open the bulk actions menu
Once one or more checkboxes are selected, the top menu transforms to show bulk actions. This menu is where you initiate every multi-story change. The interface keeps everything contextual so you can apply changes without leaving your project view. If you need to perform a different action later, simply reselect items and reopen the bulk menu.
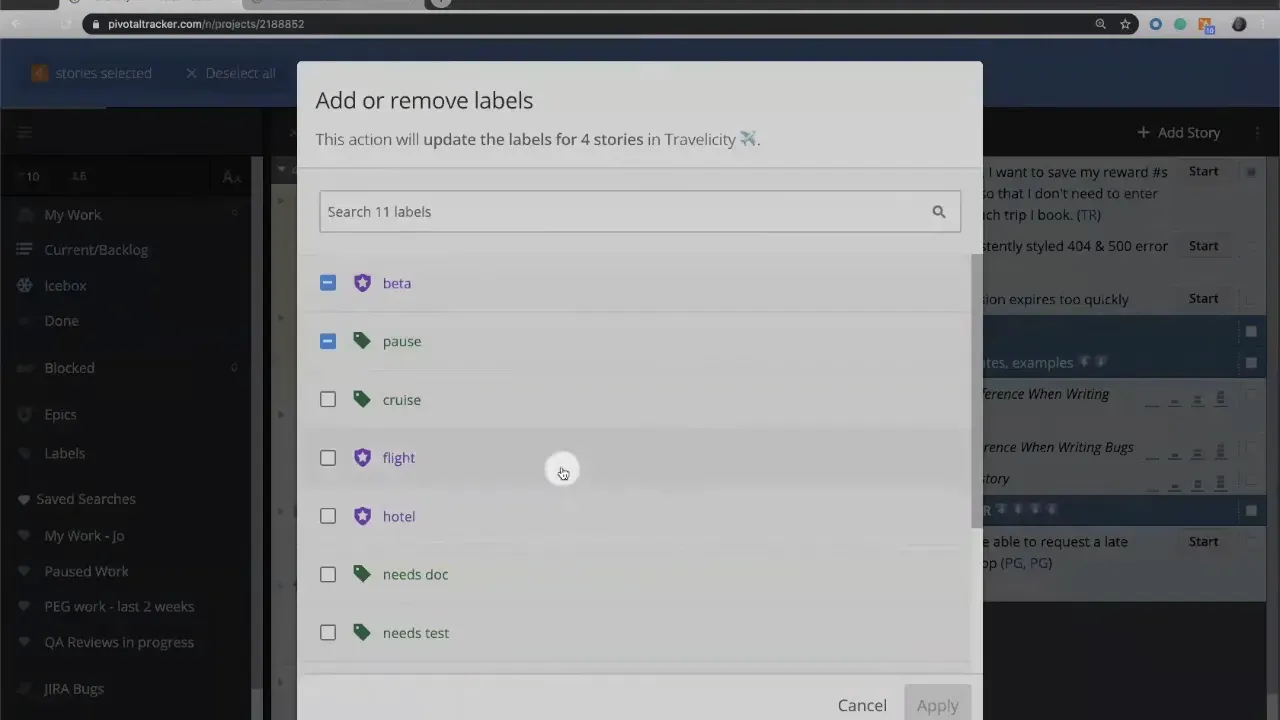
Step 3: Assign labels and epics in bulk
Applying labels-and-epics-to-slice-your-story-views-in-tracker" target="_blank">labels or assigning an epic across multiple stories improves findability and planning. Use bulk label assignment to add a green label or link several stories to a purple epic at once. This is especially useful when tagging related tasks for a milestone or grouping items before a sprint planning session.
Step 4: Move stories between projects or teams
When work ownership changes or a different team will execute remaining tasks, use the bulk move option to transfer selected stories to another project. This keeps project boards accurate and prevents duplicated effort. You can also move stories within a workspace, but moving directly from the project view is often faster.
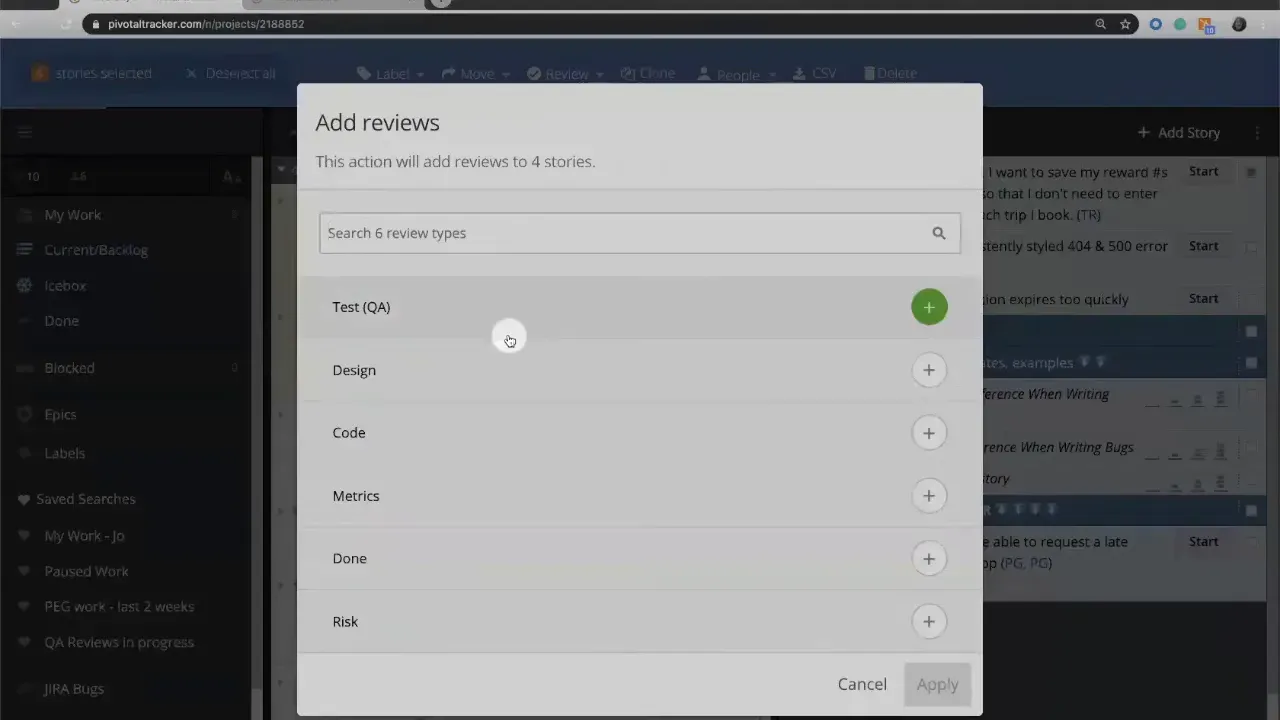
Step 5: Create reviews across multiple stories
In a case when a QA, design, or product sign-off has to be done for a set of stories, you can now create simultaneous reviews. Select a review type and apply it to the picked stories so that reviewers will get the same assignments. This is ideal for situations when several stories require the same review path to be followed after a development push.
Step 6: Clone stories in bulk
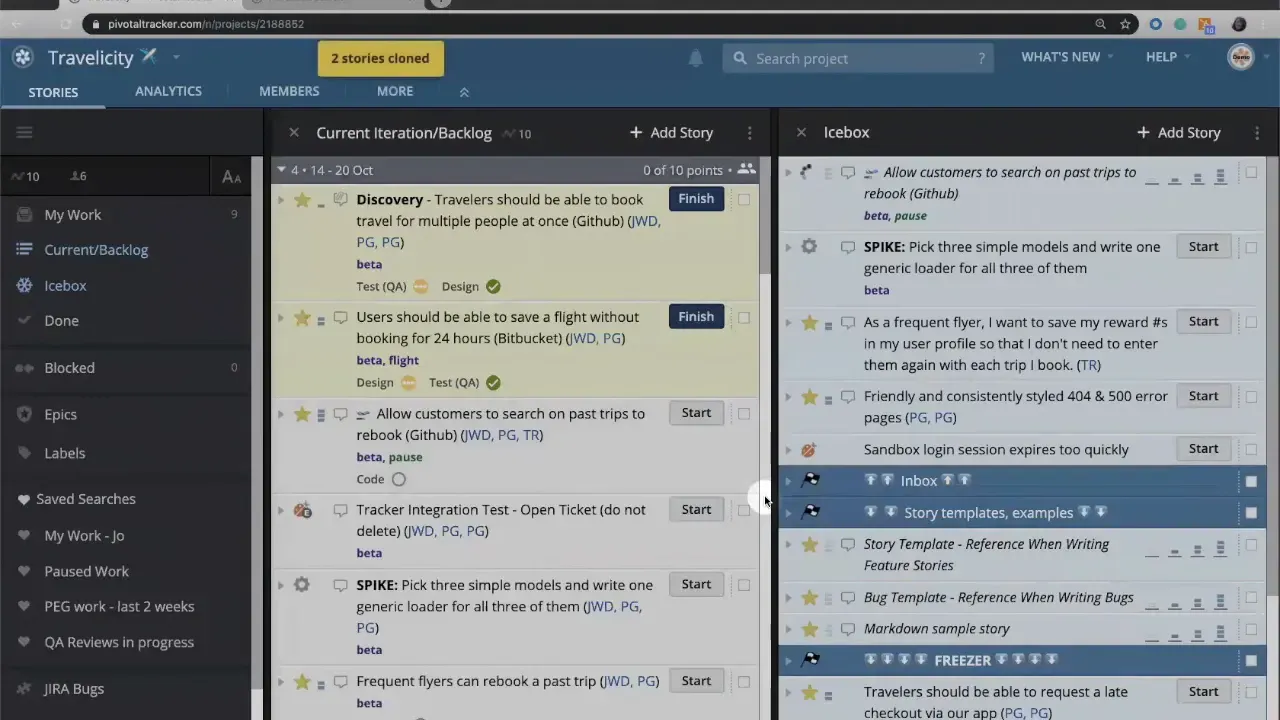
The ability to clone multiple stories has its advantages especially in scenarios that require you to do the same tasks across different platforms or environments. As an example of this, when a particular function is included in both iOS and Android, you can make copies of the original stories, and change their names to represent the respective platforms. Thanks to bulk cloning the initial layout is kept the same and time is saved that would need to be used for the tedious process of creating similar work items anew.
Step 7: Replace owners or requesters
In situations where responsibilities are altered, feel free to take advantage of the use of the bulk replace mode to update the ownership or requester fields for several stories at the same time. For example, if a stakeholder wants certain stories to be shown or to be reassigned to a different developer or team lead, you can easily do that with bulk replace mode. Apart from accurately dealing with the attribution of the tasks, this is also a way to minimize the confusion during the handoffs.
Step 8: Export a subset to CSV
Export selected stories to CSV to analyze progress, produce reports, or share a filtered view with external stakeholders. Pick the subset first, then export. A targeted CSV keeps the spreadsheet clean and focused on the work that matters for the moment.
Step 9: Use delete with care and recover if needed
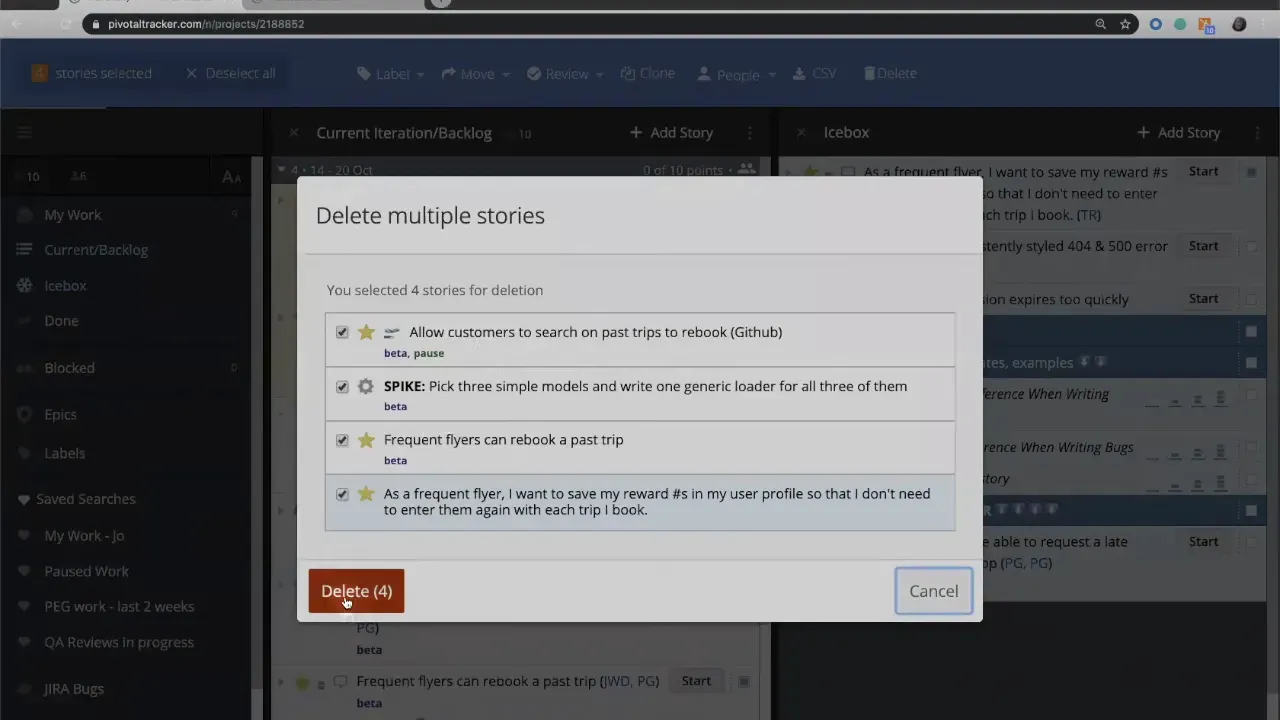
Deleting stories in bulk is available but labeled as "to be used with caution." When you delete, you receive a confirmation that indicates how many stories are selected. If you accidently confirm, account owners and admins can recover deleted stories later. That recovery safety net prevents permanent loss from accidental bulk deletes.
Step 10: Final behavior and best practices
The bulk actions menu automatically closes after finishing a bulk action to prevent accidental changes to the interface. For further actions, all you have to do is select the stories again and reopen the menu.
- Tip: Batch similar edits together. Apply labels, then move, then create reviews in separate passes to keep changes predictable.
- Tip: Use cloning for cross-platform work to preserve steps and acceptance criteria.
- Tip: Export before deleting if you might need a record for audits or retrospective analysis.
The use of LiteTracker bulk editing performs the clean-up task repetitively like a pro in just a few clicks. Aiding in the tasks of labeling, moving, reviewing, cloning as well as team-wide consistent exporting means nobody would miss anything.
Common bulk editing scenarios
Here are some practical instances demonstrating how bulk editing can expedite the workflow:
- Mass-tagging new stories created from a discovery session so the product team can find them later.
- Moving leftover backlog items to a maintenance project when the primary team changes focus.
- Creating review assignments for a batch of completed stories before a release candidate.
- Cloning a feature set to run parallel QA on different operating systems.
How can I recover accidentally deleted stories?
If you are an account owner or an admin you can recover deleted stories. Use the account recovery tools to restore the items that were removed during a bulk delete.
Can I move stories to a different team or project in one action?
Exactly. First, you need to choose the stories and apply the bulk move action to move them to another project or team location. You can do it either from the project view or the workspace.
Will cloning preserve attachments and comments?
Cloning typically duplicates story fields and core content. Check your environment to confirm whether attachments and comments are copied. If you depend on those, perform a test clone with a single story first.
Is there a way to export only the fields I need?
For a CSV export choose the desired stories from the subset. The standard fields will be copied to the exported file. In the case of the custom fields, it would be necessary either to check the CSV columns after the export or to use additional tools to filter the information that has been sent out.
What happens to the bulk actions menu after an operation?
Post a bulk operation, the bulk actions menu will automatically close to prevent you from remaining in an open bulk-edit state. If you need to perform another action, you can reselect the stories.
Indeed, LiteTracker’s bulk edit is the best solution to keep your busy projects in good shape. Utilize the steps provided to make the regular updates easier and maintain an accurate and actionable backlog.
Bulk Edit Checklist
Before performing a bulk operation, it is advisable to utilize this rapid checklist in order to minimize human errors and to ensure the respective auditability.
- Pick a small test set first to verify outcomes.
- Export the selected stories to CSV if you might need a record.
- Apply labels or epics in a separate pass from moving or deleting.
- Confirm ownership and requester fields before replacing owners.
- When deleting, double-check the confirmation count and ensure admins can recover if needed.
Extra recommendations: Maintain a naming pattern for duplicated stories (for instance, "Feature - iOS") and plan the review creation right after the development pushes in order to prevent backlog drift.
Credits: This tutorial is created based on this original video Editing Tracker Stories in Bulk