LiteTracker users treat release stories as simple but powerful tools: dividers, milestones, and a live indicator of whether the plan is holding. This guide shows a clean, step by step approach to using release markers to organize an icebox, set deadlines, react to added scope, and keep your team aligned. Use these steps whether you are adopting a LiteTracker mindset inside Pivotal Tracker or building a similar lightweight workflow.
Step 1: Use release markers as visual dividers
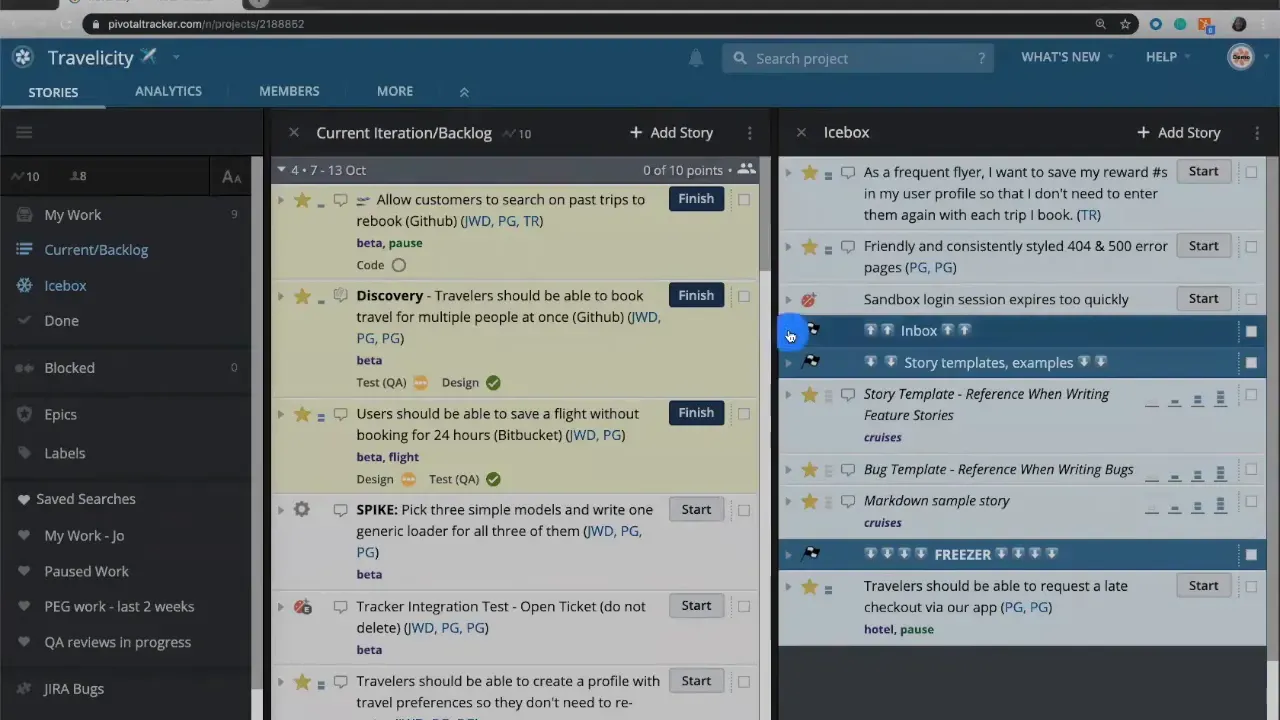
Start by turning release stories into practical separators in your icebox. A release marker can be as simple as a one-line story titled with an emoji or label. For example, create markers for:
- Inbox — stories you are actively considering.
- Templates — cloneable stories you reuse.
- Freezer — work you started but put on hold.
With this system, the icebox stops being a long, undifferentiated list and becomes a set of searchable sections. A LiteTracker approach emphasizes low friction: the markers are lean stories that make it quick to find what matters without extra fields or paperwork.
Step 2: Turn release markers into milestones with dates
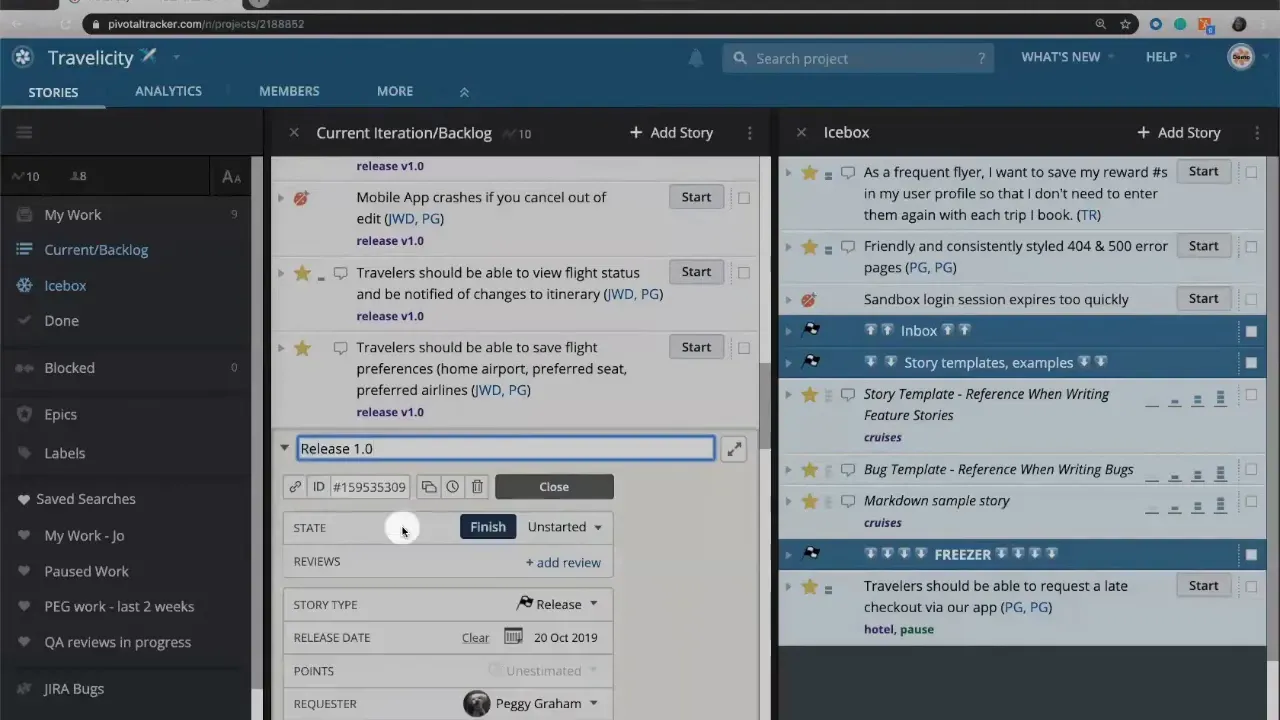
Beyond dividers, release markers serve as milestones. Add a date to a release story and it represents a target for all stories above it. The release automatically applies to the stories positioned above that marker across iterations. This lets you:
- See at-a-glance which stories belong to a release.
- Set a single goal date for a group of stories rather than tagging each one.
- Keep planning tight and visible.
In a LiteTracker workflow, you rely on position and date rather than heavy metadata. Place a "Beta" marker in iteration four and a "Release 1.0" marker further down to communicate two different goals and deadlines on the same board.
Step 3: Let the tracker tell you when scope changes matter
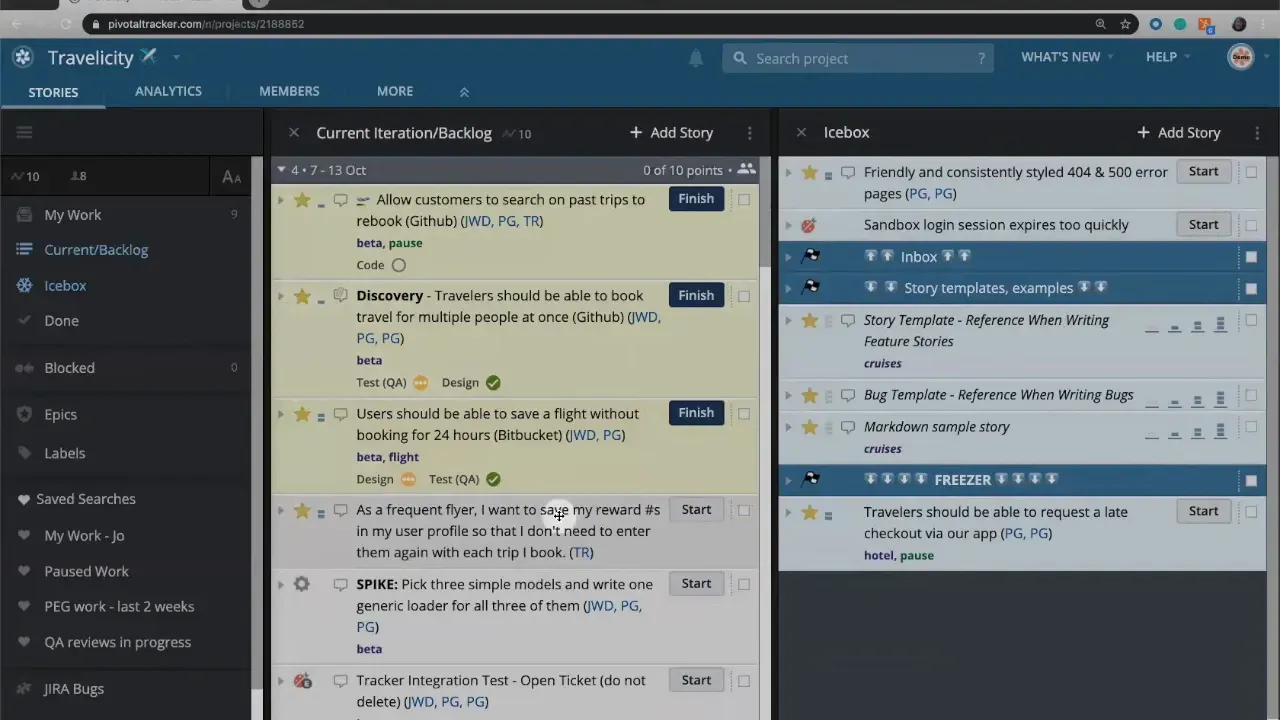
Trackers with built-in velocity will prevent you from overcommitting. When you drag a new story into a current iteration, the system rebalances planned work based on your velocity. If that shift pushes stories below a release marker, the marker changes color and signals risk.
Colors are a lightweight but effective feedback mechanism. A blue release marker means you are on track. A red marker means the planned work no longer fits the date. Use that color change as a prompt to discuss options with the team, not as a blame indicator.
Step 4: Respond to a red release marker
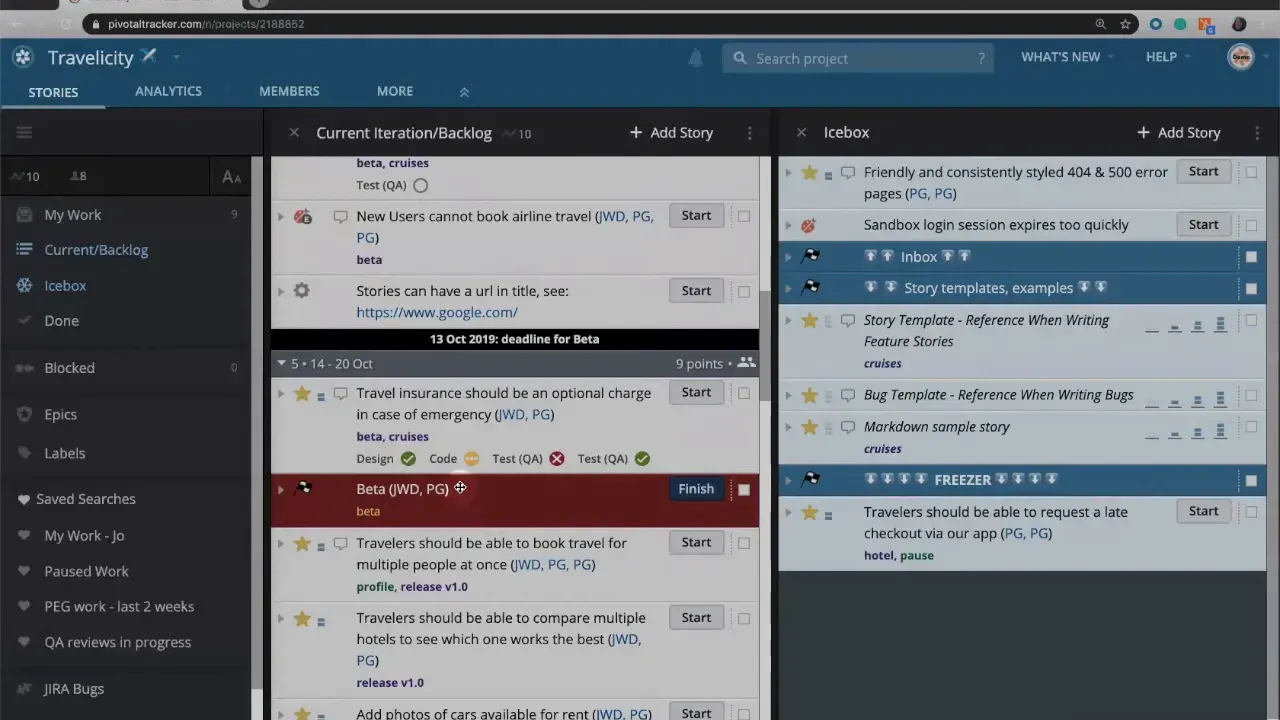
When a release turns red after scope is added, you have two straightforward choices:
- Cut scope — remove or postpone stories below the release marker so the remaining work fits the original date.
- Delay the release — move the release date forward to accommodate the new scope.
Both options are valid. The choice depends on priorities and stakeholder expectations. If a single two-point story created the red flag, moving it below the marker restores the original plan and the marker returns to blue. If multiple stories push the release late, sliding the date forward by a week may be more realistic.
Step 5: Use analytics to validate decisions
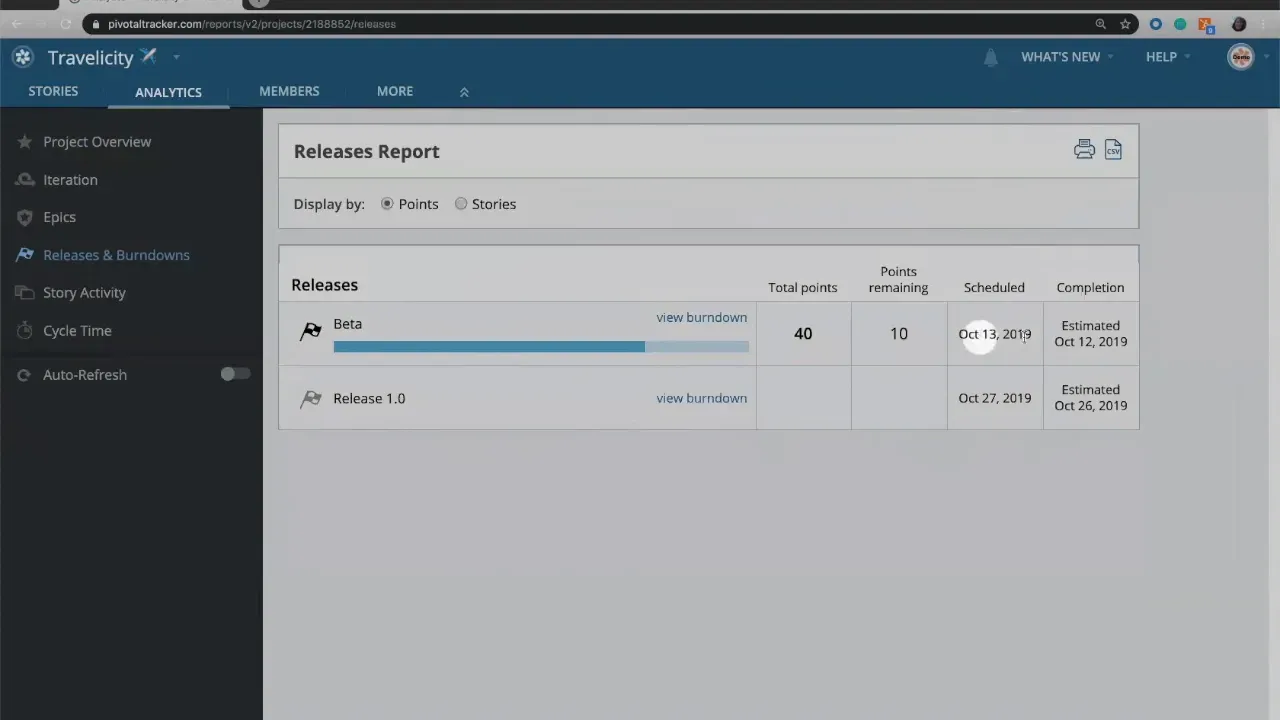
Analytics will reflect the board state: release status, scheduled dates, and the platform's estimated completion date. Check releases in the analytics dashboard after adjusting scope or changing dates to confirm the board and analytics align. A LiteTracker habit is to treat analytics as a second opinion: it confirms whether a manual adjustment actually brings the plan back on track.
Step 6: Practical conventions for clean release management
Adopt these simple conventions to keep release markers useful and frictionless:
- Name consistently — use predictable labels like "Inbox", "Beta", "Release 1.0", and "Freezer".
- Use icons sparingly — an arrow up for active work and a down arrow for paused or template sections works well.
- Keep releases lean — a release story should be a one-line milestone, not another epic to maintain.
- Position wins over tagging — position stories above or below a release to include or exclude them.
These habits support a LiteTracker philosophy: minimal ceremony, clear signals, and easy adjustments.
Step 7: Example workflow scenarios
Scenario A — You add a small, urgent fix to the current iteration and the beta release turns red. Dragging the fix below the beta marker restores the plan.
Scenario B — Multiple stories shift into the release and analytics show the estimated completion date now extends past the scheduled date. Rather than chopping high-value items, move the release date forward and communicate the change. The tracker will update and the release marker will turn blue again when the plan fits the new date.
FAQ
How exactly does a release marker apply to stories?
A release marker applies to every story placed above it on the board. Positioning a marker below stories groups those stories into that release without adding tags to each one.
What do the colors on a release marker mean?
Blue indicates the planned work fits the release date. Red indicates the planned work exceeds what the current velocity can deliver by that date. Use the color change as a signal to cut scope or shift the date.
Should I set dates on every release marker?
Dates are optional but useful. Setting a date turns the marker into a milestone and enables analytics to estimate delivery. In a LiteTracker approach, apply dates to meaningful milestones, not every small divider.
What if analytics and the board disagree?
Analytics reflect the board state and velocity. If they disagree, check story positions, iteration assignments, and velocity settings. After changes, recheck analytics to confirm the release status.
Can I use release markers as templates or frozen storage?
Yes. Use release-like markers to separate templates or paused work in the icebox. Label them clearly so templates are easy to clone and the freezer holds items you may revisit later.
Final notes and mindset
"Their primary function is to act as milestones, lines in the sand, goals your team is aiming for."
Release markers are not just scheduling tools. They are communication devices. Make them visible, keep them lean, and react when they change color. A LiteTracker focus on position, simplicity, and quick feedback helps teams make deliberate decisions: cut, delay, or commit. Use the markers to reduce uncertainty, not to create bureaucracy.
Implement these steps and conventions and your board will become an active planning instrument instead of a passive list. Release markers will start to feel like lightweight guardrails that keep the team moving at a steady, predictable pace.
Suggested link placements
No external links were supplied with the request, so I couldn't insert any actual URLs into the article. Below are recommended 1–3 word anchor texts and the spots where they would be most relevant. Once you provide URLs, I can insert them exactly as shown.
- release markers — place in the paragraph that begins "Release markers are not just scheduling tools."
- analytics — place in the paragraph under "Step 5: Use analytics to validate decisions."
- velocity — place in the paragraph under "Step 3: Let the tracker tell you when scope changes matter."
- milestones — place in the sentence "Add a date to a release story and it represents a target for all stories above it."
Provide the URLs for any of the above anchor texts and I will return a JSON with the exact link placements inserted into the article.
Credits: This tutorial is created based on this original video Releases and how to use them